Showing posts with label appetizers. Show all posts

Monday, October 9, 2017

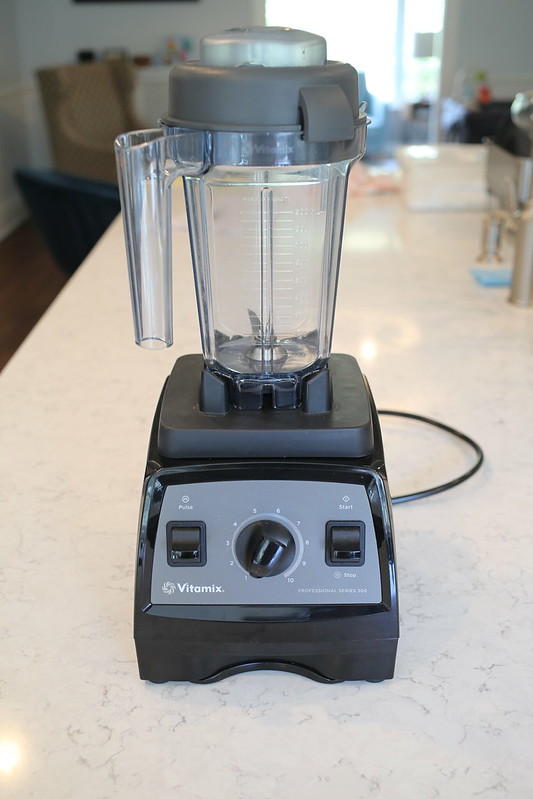
The Vitamix: My Kitchen Essential

Vitamix


What's my go-to kitchen gadget essential? Definitely my Vitamix! I was recently gifted this gorgeous blender--which is an update from the previous Vitamix model I had. It has an even more powerful motor (2.2HP!) that's somehow even quieter. Blends like a true dream. And even comes with a super large (64oz!) container (pictured below)--great for when you're making soups, family-size batches of anything, or whipping up large amounts of food for a little entertaining.
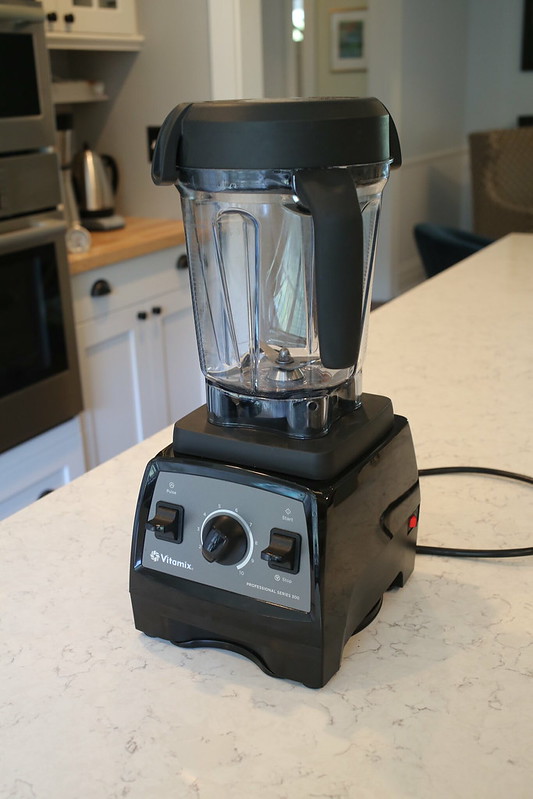

Vitamix 6

Of course, the first thing that comes to mind when you think blender is smoothie! And rightly so. It takes about 20 seconds to whip up a smoothie in the Vitamix. And when you're done, you just add a touch of soap and fill the container half way with hot water, blend for 60 seconds, and you've got a clean blender! Not bad at all. My frequent regular smoothies are a banana berry smoothie, and a peanut butter banana smoothie (with a touch of chocolate), but there are so many other delicious options (like green smoothies!).  And the Vitamix is also great for making frozen drinks and sorbets. The Vitamix comes with a fabulous recipe book with an impressive variety of ideas. So far everything I've tried has been delicious!
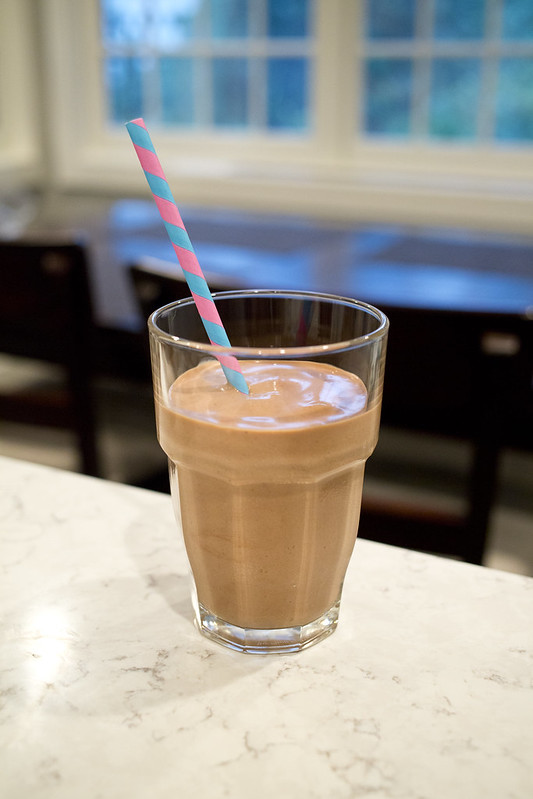
PB banana choco smoothie

In the winter time, the Vitamix gets pretty heavy use in our home for soups (follow the link for some of my recommendations)! Again, too many great options here to count. One of my all time favorites is butternut squash soup. The Vitamix allows you to vent steam as you blend, so you can make pretty much anything in here. And, if you blend for several minutes, it will actually create heat!
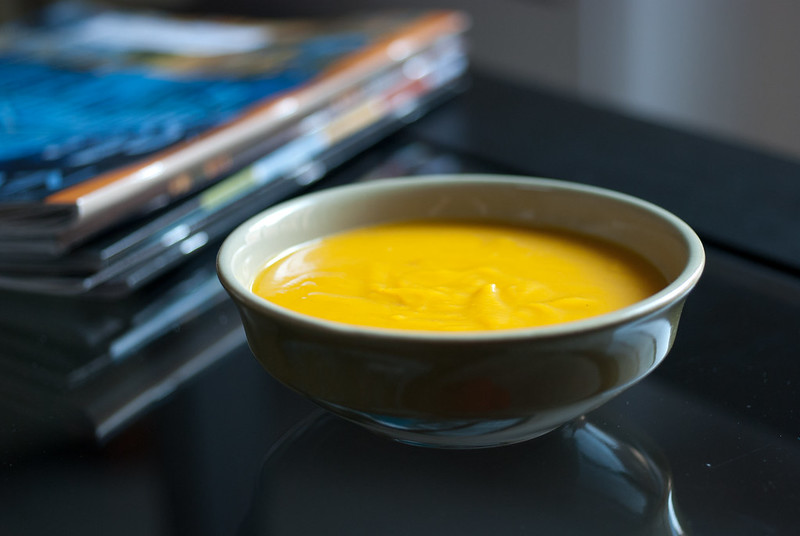
vegan butternut squash soup

The Vitamix is also a whiz with dips and spreads--pretty much anything you can think of, it can blend! If you're looking for some dip ideas--I love the curried carrot dip from Veganomicon, as well as the white bean aioli!
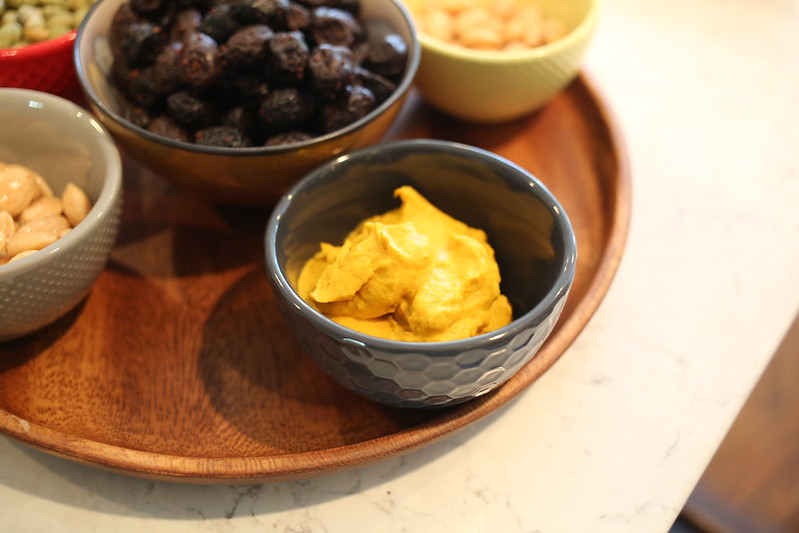

curried carrot dip

As far as dressings and sauces go this blender is great for any and everything you can imagine. If you're making nut-based pasta sauce, the Vitamix is a real life saver. Cashews are transformed into a smooth and creamy sauce in under sixty seconds. And you won't have to worry about anything chunky or gritty remaining when you're done blending. A high-powered blender is a real must if you're interested in making your own vegan cheese!
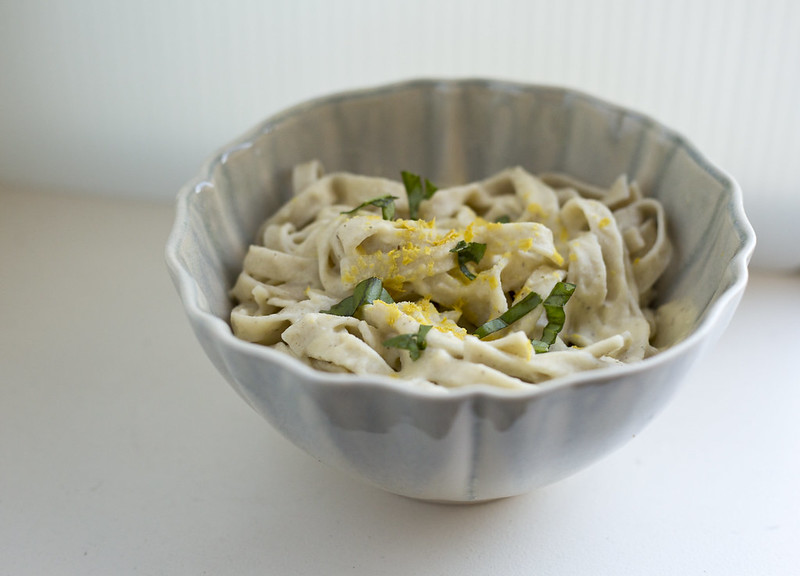
Untitled

Vitamix also states their blenders are great for mixing batters and doughs, making juices, nut butters, flours, baby food, and non-dairy milk. I've yet to try these out. I think I'll try my hand at making some almond milk next. Can't wait to give it a whirl--pun intended!

Sunday, October 8, 2017

Salad Time!

20160521_iPhone_food_010


When it comes to salad options, there is no shortage of fun, filling, and delicious recipes for plant-based dining.

The recipe for the ranch salad with buffalo tempeh pictured above comes from Isa Chandra's site. It is filling and--equally as important--packed full of flavor.

One of my favorite recipe books is Salad Samurai, by Terry Hope Romero. With a variety of hearty options, and organized by season (so that the produce you use in each salad is at its best) this book really has it all. I've yet to be disappointed with a recipe. Some are certainly more time intensive than others, but all yield extremely satisfying results. I brought the blueberry tamari greens bowl to a work party and it was a smash hit, and I've made the green curry lentil quinoa salad for a gluten-free friend (delicious!). More recently I made the smokehouse chickpea salad, which my husband and I devoured. Many of her recipes call for the use of a grill or cast iron grill pan--and these are some of my favorites: the roasted corn salad with avocado is the perfect summer salad, the fiery fruit and quinoa salad kind of blew my mind, and the pesto cauliflower and potato salad? Incredible!


Friday, October 6, 2017

Vegan Cheeze-a-licious

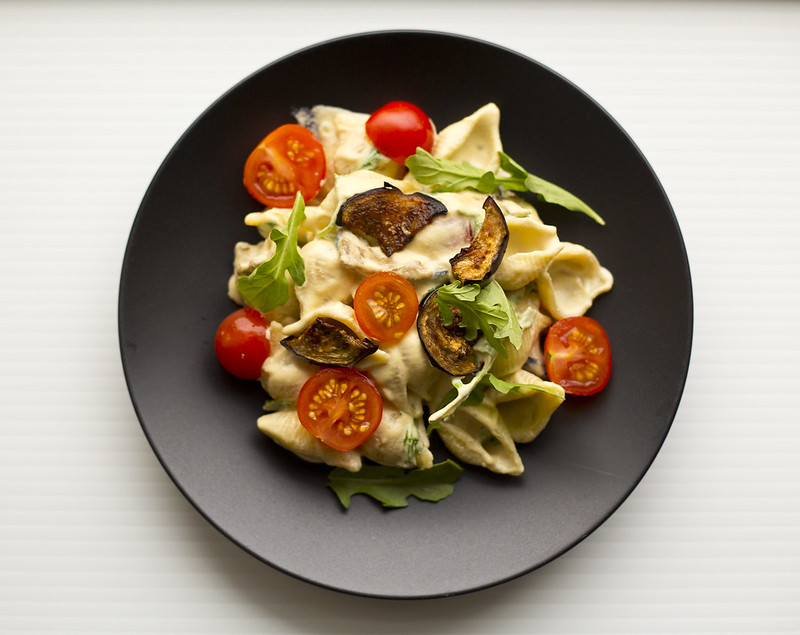
20160709_BLTmacncheeze_0006


Today for the Vegan Month of Food we're talking all about vegan cheeze!

I wanted to go over some of my personal favorites, starting with the recipe above which is one of my go-tos for vegan mac and cheeze. The recipe comes from Isa Chandra, for her BLT mac and cheeze (complete with tomatoes and eggplant "bacon"). The sauce is cashew-based and creamy, and you'll have to work hard not to devour the eggplant before it gets added into the pasta!

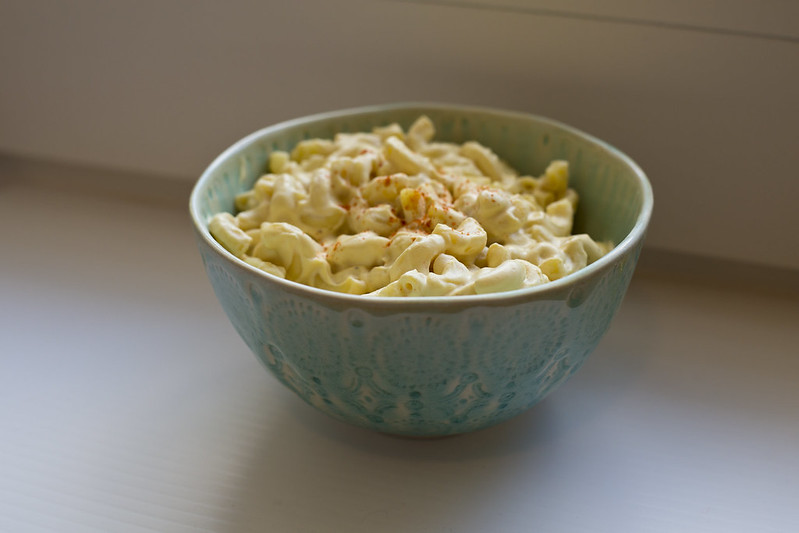
Inspired by Isa's recipe, and a smoky mac I had at an NYC restaurant, I developed a smoky mac and cheeze that I also love, which involves a little liquid smoke for a flavor kick.

smokey mac

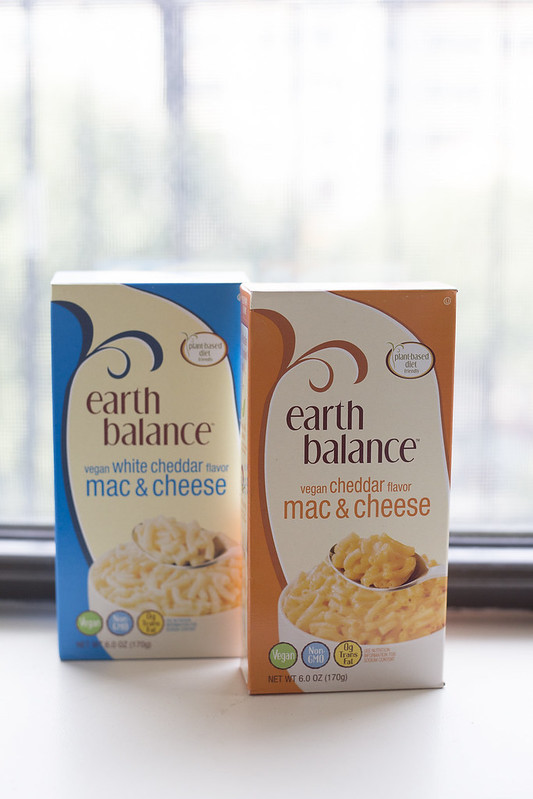
Don't have the time (or the blending power) to make your own cashew-based macaroni and cheese? How about trying out the instant mac and cheeze from Earth Balance. It's sort of like the Kraft mac 'n cheese of the vegan world--although I think it's even better!

Untitled

You can often find these at Whole Foods, or from online retailers like Thrive Market.

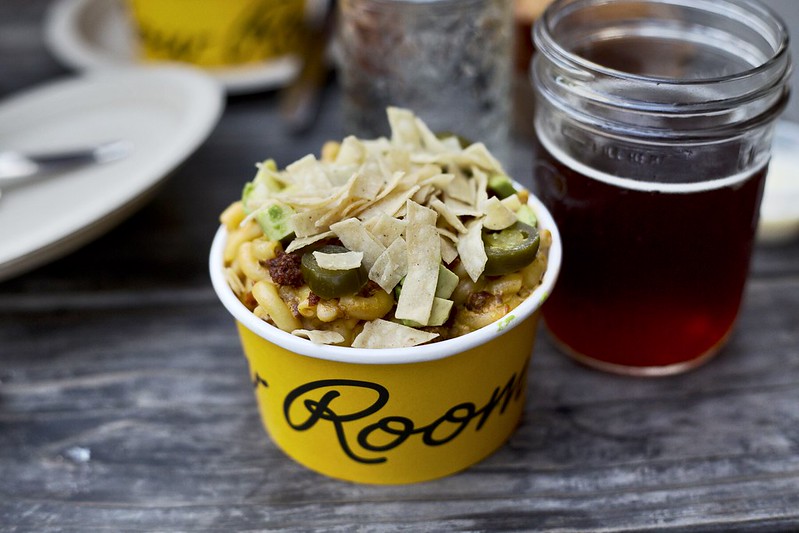
If you're looking to have someone else make the mac, and you're in the New York area, I recommend going to Morgan's in Brooklyn. They have a delicious vegan mac with avocado, veggie chorizo and jalapeños!

20150923_LVE_0007

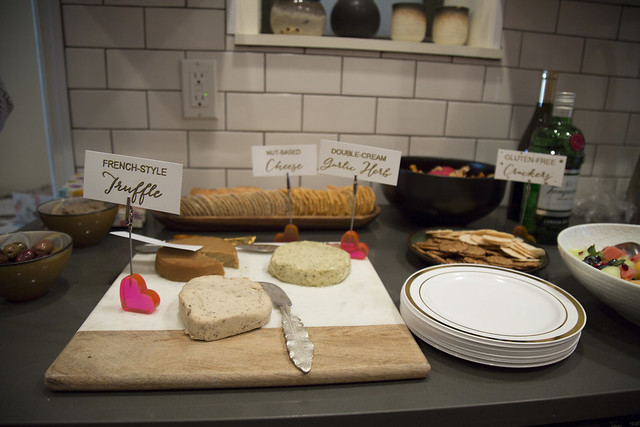
Looking for vegan cheeze you can order online? Miyoko's Kitchen has some super amazing cashew-based options that are the best I've ever had (they also have a mac and cheeze sauce!).

Untitled

For the ambitious home cook, Miyoko also has an amazing cookbook (Artisan Vegan Cheese) with recipes for cheeses you can make at home. Many involve creating your own culture (which is a lot of work, but very rewarding!).

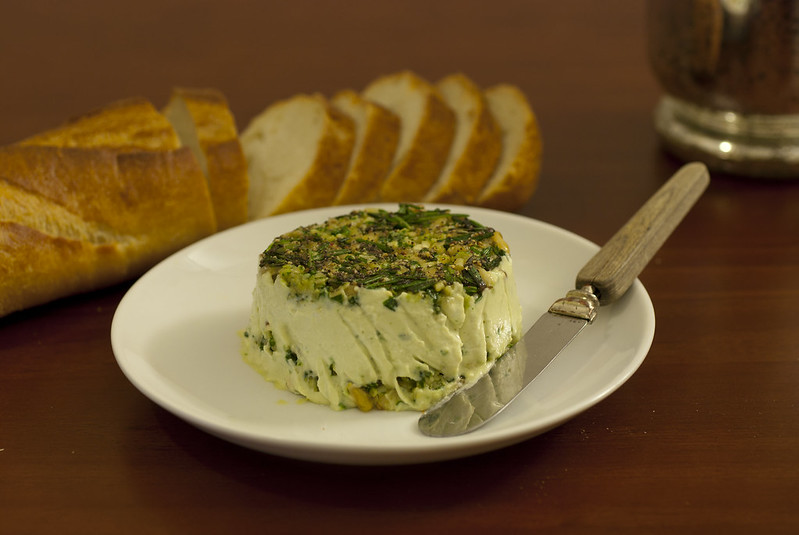
For a simple cheese you can create in an afternoon, one of my favorites is this "goat cheese" from the Fork and Beans blog.

"Green" Cashew Cheese Spread

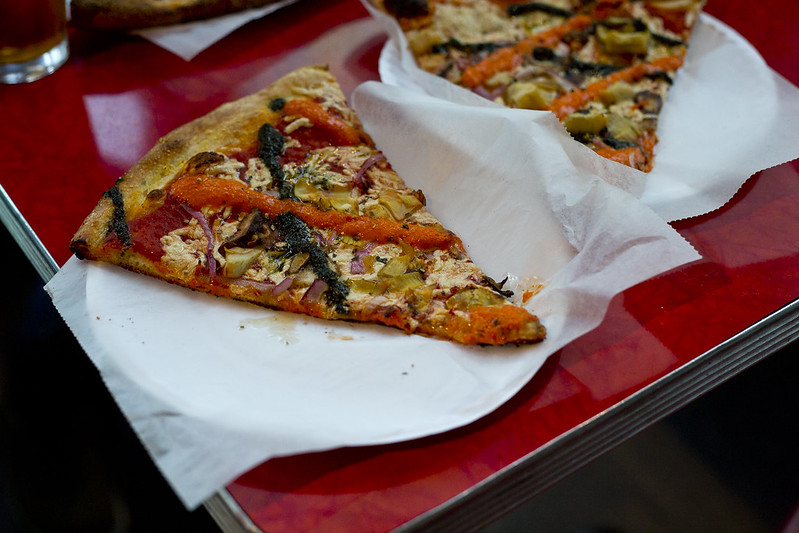
If that sounds like too much work and you're in the New York area, there are some great vegan pizza options!

I love Two Boots' V is for Vegan pizza--you can read more about it here.

Untitled

What are your favorite vegan cheezes? I hope you have a chance to try one of these! I'm getting hungry just looking at them!

Monday, September 21, 2015

Vegan MoFo: What 3 Endless Food Supplies Would You Take if You Were Stranded on An Island?

20150523_Kauai_0028


As the title of this post indicates, today's Vegan MoFo prompt asks what three endless food supplies you would take if you were going to be stranded on an island. This is imagining all of your nutritional needs have been met--these are a bonus!

1. Miyoko's Creamery cheeses
Untitled


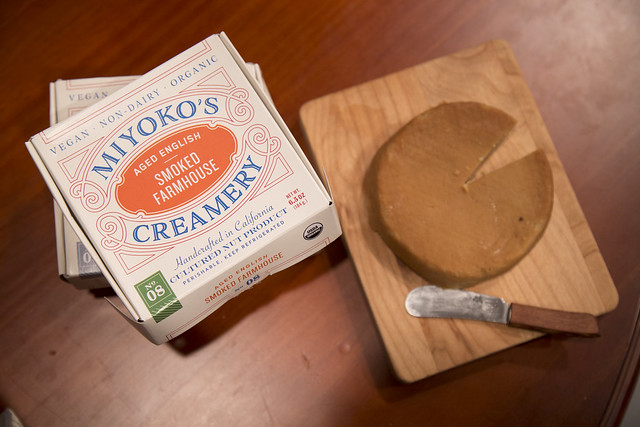
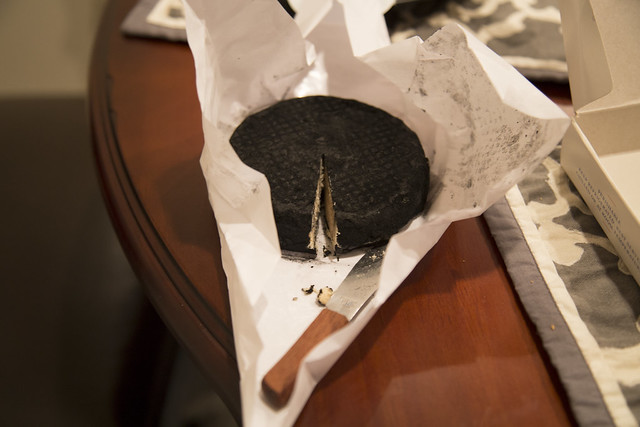
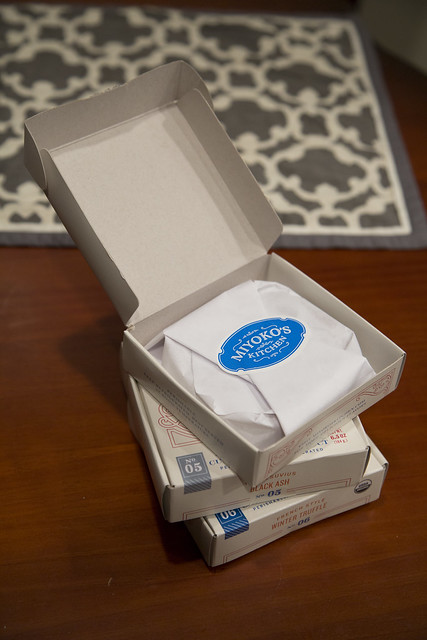
For those of you who are not familiar with Miyoko's Kitchen--you should be! They offer a line of delicious vegan artisan cheeses--including flavors like Aged English Smoked Farmhouse (above) and Mt. Vesuvius Black Ash (pictured below).

Untitled

Although they are only available in select Northern California stores, you can order them online. They are expensive though (a "special occasion" kind of purchase), but if you're feeling adventurous you can buy the recipe book (Artisan Vegan Cheese) and make nut-based cheeses yourself!

vegan cheeses

Although most of the cheese recipes require a significant amount of time (like making your own culture over several weeks!), I can testify that they are truly worth the effort. I've never had any vegan cheese quite like it.

Untitled


Miyoko even has a blog with all kinds of great recipe ideas for these delicious cheeses--enough to keep me happily satisfied on my deserted island!

2. Kale chips

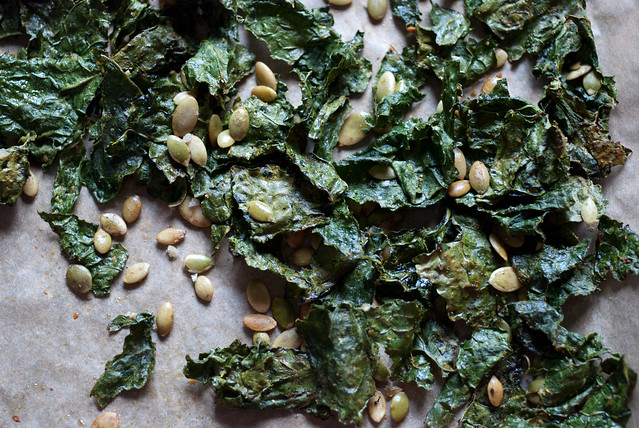
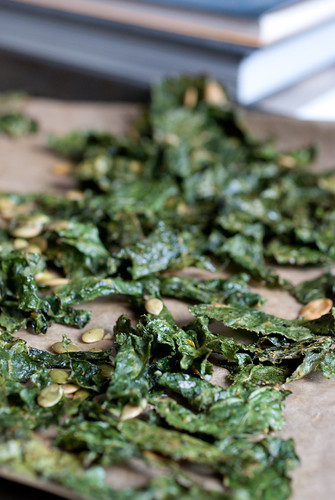
kale chips with roasted pepitas

Need I say more? Who cares about how healthy they are--kale chips are just plain delicious. Add some nutritional yeast, some cayenne, some garlic, some pepitas, whatever you like (!) and you've got a totally addictive snack. Check out my recipe here.

3. Cupcakes

vegan chocolate sandwich cookie cupcakes

Again, this requires little explanation, but if you're looking for one, just check out my entry about my favorite cookbook and all of its cupcake-y goodness. The possibilities are endless and yet each and every one is so delicious!

That about sums it up!

I've covered all my food groups, right? Protein (cheese), greens (kale), sweets and carbs (cupcakes)?

Saturday, February 1, 2014

Super Bowl Snacks (2014)!

Super Bowl snacks!


It's that time of year again! You may remember my post from last year, which featured lots of different small appetizer ideas. I thought I'd share some more thoughts this year, and let you know what I'm planning for my menu this year (we'll be expecting substantially more people, so I'll be introducing lots of new ideas, as well as incorporating my old ones!).

Of course, the great thing about all of these recipes, is they make great, easy snacks any time of year!

Here's my menu for this year:

barbecue apricot "meat"balls
polenta cornballs with spicy marinara
"cheesy" roasted chick peas
pineapple, pepper and pecan "cheese" spread (adapted from a Vitamix recipe book--more on this soon!)
cauliflower buffalo "wings" (I may adapt this recipe from my buffalo tofu from last year)
hot caramelized onion "bacon" dip
artichoke dip
chocolate thumbprint cookies
And maybe even some kale chips!

We've also got lots of store-bought salsa, hummus, and plenty of items for dipping on hand!

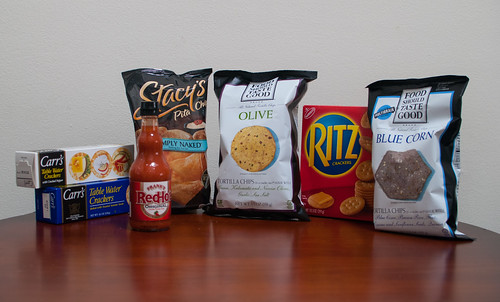
Which brings me to the photo above! Aside from some carrots, celery, cherry tomatoes, and bell peppers for dipping, we've got some Stacy's pita chips, Carr's crackers, Food Should Taste Good chips, and even Ritz crackers (I may have gone a bit overboard, but I figure whatever we don't get to will make for good future snacks...). That's right, Ritz crackers--check out the PETA website for lots of other foods you can find at the grocery store that also happen to be vegan (like Frank's Red Hot Sauce--perfect for your buffalo "wings"). Both Stacy's and Carr's offer vegan as  well as non-vegan snacks--be sure to check the ingredients list before purchasing.

I've got to thank my friend Anne for some of these recipe ideas (she'll be making some of them tomorrow!)--for even more Super Bowl recipe ideas (from a new vegan cookbook), you can check out her Super Bowl post here!

Enjoy your snacking--and the game!

Saturday, November 2, 2013

Autumn-Style Kale Chips

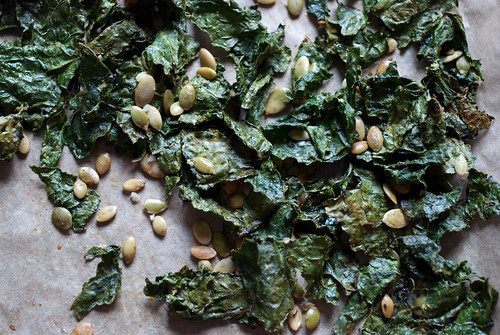
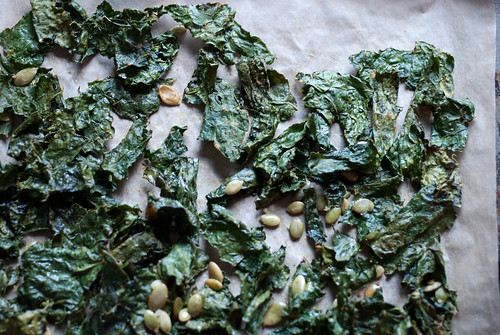
kale chips with roasted pepitas


Looking for a nice leafy green to add to your autumn repertoire?

Might I suggest some kale?

Rich in antioxidants (tons of vitamins A, C, and K), kale is also a good source of minerals, such as iron, copper and potassium. Additionally, it has been shown to help lower cholesterol levels, especially when cooked!

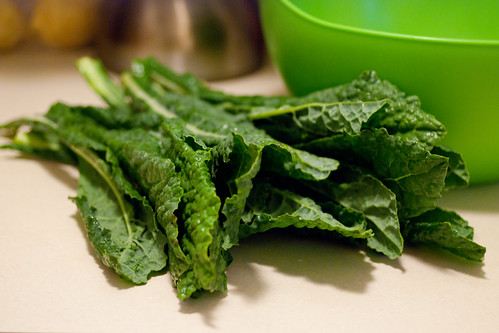
kale

You're probably already somewhat familiar with kale, and if you've spent much time at your local health food store (or health food aisle), you may also be familiar with kale chips! If you've happened to pick up a pack, you may also have noticed their high price. There's a reason for that price--they're delicious! And somewhat addictive. And lucky for your wallet, super easy to make!

I like to throw in small amounts of a different spices, and I was recently inspired to throw in some pepitas! Pepitas (which is just a fancy word for pumpkin seeds), are a great source of fiber, protein, potassium iron and zinc, so they make another healthful (and tasty!) addition to this snack. If you like to save your Halloween pumpkin seeds, here's a creative way to incorporate them into your cooking.

kale chips with roasted pepitas

Autumn-Style Kale Chips
What You'll Need
One bunch kale*, de-stemmed and chopped or torn into roughly 1 1/2 inch pieces
1 tbsp olive oil
2 tsp nutritional yeast
1/4 tsp sea salt
1/8 tsp chile
1/8 tsp garlic powder
1/8-1/4 cup pepitas
several cracks fresh pepper, to taste

What You'll Need to Do
Preheat oven to 300F. Put the kale pieces in a large bowl, and toss with olive oil. Sprinkle in remaining ingredients, and toss again. Spread them out on a baking sheet covered in parchment paper. Bake for 25-30 minutes, until dry and a bit crispy.

kale chips with roasted pepitas

Tips and tricks
Curly kale is usually recommended for making kale chips, but as you may be able to tell from the picture above, I used the more flat-leafed variety for this batch. I've had the curly stuff too, and it is quite good, but I've found that either type works great!

Experiment with your own combinations of salt, pepper, and different herbs and spices. It's pretty hard to go wrong!

Friday, March 29, 2013

Miso Soup with Udon Noodles

Miso soup with udon noodles

When I was in college one of my favorite things to prepare was udon noodle soup (usually the instant kind), with some tofu, enoki mushrooms, and an egg thrown in. The instant packets available at the supermarket typically contain fish, and aside from that are filled with all kinds of things that aren't altogether too healthy. These days I like to make my udon soup from scratch. For a little added flavor and substance in my broth, I just add a little miso.

Miso Soup with Udon Noodles
What You'll Need:
8 cups water
6 tbsp white miso
1 bunch baby bok choi (or pak choi), sliced thinly (you can include both stalks and leaves)
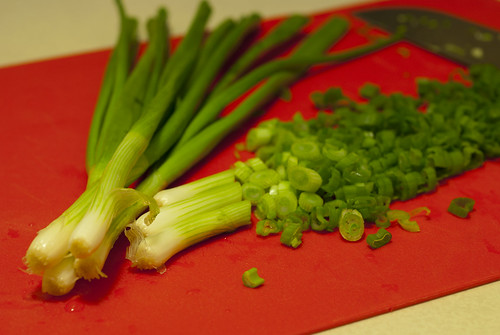
4 scallions, sliced thinly
1 14 oz. package firm or extra-firm tofu
20 oz. udon noodles, prepared according to package directions
1 tbsp sesame oil
Asian hot sauce (like Sriracha, optional)
white or black pepper, to taste

What You'll Need to Do:
Put your water in a large pot and bring to a boil, then reduce to a low simmer. Add in the miso, stirring until it is well dissolved (be sure not to boil the miso!). Add in the bok choi and scallions, and allow them to simmer and soften for approximately 10-15 minutes. While the vegetables simmer, chop your tofu into 1/2-inch cubes. After the bok choi stalks are sufficiently soft, add in you tofu and noodles, and stir in the sesame oil. Season to taste with pepper, and hot sauce, if desired.

My Thoughts:
This is a great, super-simple soup base, and you can throw anything in that you like! I used extra-firm tofu because that's what I had on hand, but it's especially good with firm silken tofu. You can also use red or brown miso for a stronger flavor (white miso is the most mild). I'd also recommend trying this soup with seaweed (just simmer it in the water first thing, for about 5 minutes, before adding the rest of the ingredients) and enoki mushrooms.

green onions

Tuesday, March 12, 2013

Dinner featuring "Green Cheese"

Looking for a nice dinner idea for next weekend? My suggestion here is a bit involved, but all of the recipes are actuality quite straightforward. The cheese and bruschetta can be prepared in advance, and the gnocchi recipe I went with was very simple!

St. Patrick's Day is just around the corner, so I thought I'd try a green twist on some cashew cheese!
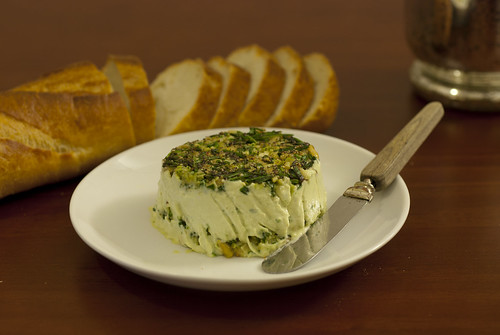
"Green" Cashew Cheese Spread

This is an adaptation of the recipe from the Fork & Beans blog, which has some really terrific gluten, egg, and dairy-free recipes.

I followed the recipe on the site, leaving out the sun-dried tomatoes, and adding some pesto and spinach for color (I used about four leaves of each, but you could add a bit more for an even deeper green color). I lined the bottom of a ramekin with plastic wrap, then added some of the pine nut pesto, as well as chopped rosemary and thyme (this layer became the top once released from the ramekin). I added a bit more pine nut pesto towards the bottom, and topped with a thin layer of cheese. I found that the original pesto recipe called for too much salt; I would have used just 1/4 tsp rather than 1 tsp. Otherwise, it was perfect!

Although the green cheese was my "St. Patrick's Day dish..." I actually used it to accompany an Italian meal. It was a great appetizer! It went along perfectly with some bread and bruschetta (I can try to post a recipe for this sometime in the future--but it was just two tomatoes, half an onion, some basil, garlic, salt and pepper!).

For the main course I made gnocchi, along with some garlic spinach.
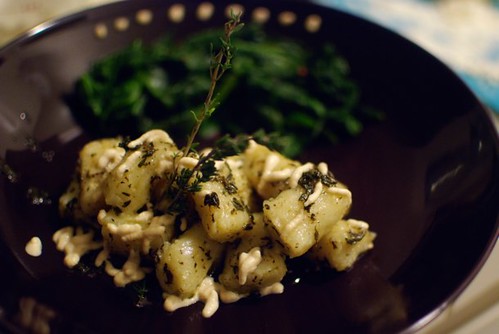
Gnocchi
If you're looking for a gnocchi recipe, you can try VeganYumYum. She has a particularly good recipe for a thyme vinaigrette and lemon cashew cream. Although I made the cream and vinaigrette, I actually tried the gnocchi recipe from the Candle 79 Cookbook this time around. The recipe was fantastic: quite quick and very easy to follow. It really just involves baking your potatoes, mashing them, throwing in some flour, oil, and salt, and then shaping. Then you just put them in some boiling water for a few minutes and you're good to go!

The gnocchi were delicious--light and (like all good gnocchi) pillowy.

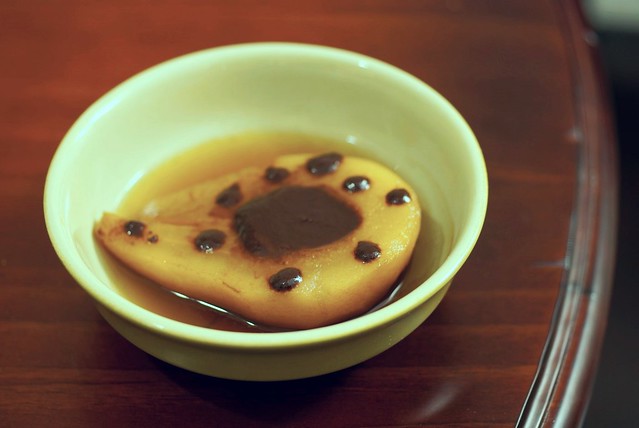
And for dessert? I tried the tea-poached pears with chocolate sauce from Veganomicon. This recipe was also very easy (pretty much just soak 'em in tea and sugar!)--next time I'd love to serve them with some ice cream!
20130309_0659

Tuesday, February 12, 2013

Teeny Tasty Party Bites

Looking for some food to serve at your next get together? Or something easy to make as a little snack?

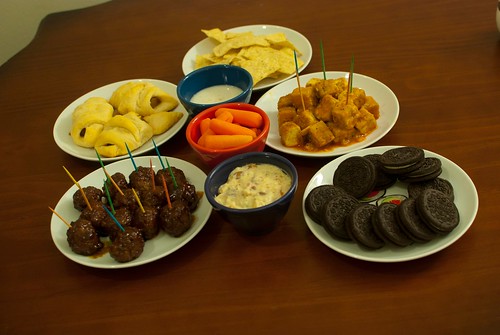
Let's take a look at my Super Bowl line up for some ideas! These are all very basic recipes, basically on homage to game-day food...certainly not the healthiest meal I've ever put together. But if you're looking for some fast, easy, tasty things to throw together for a fun night, you might want to try some of these out!
Super Bowl feast!!

The menu (from lower left, clockwise):
barbecue (apricot) meatballs
(veggie) pups in a blanket
tortilla chips
buffalo-style tofu
chocolate sandwich cookies

In the bowls (from front to back):
jalapeño queso dip
carrot sticks
vegan blue cheese dressing (for the tofu)

To break it down a bit more:
You can get my simple barbecue apricot meatball recipe here.

The pups in a blanket were just adapted from the good ol' Pillsbury crescent roll (yes, they're vegan!) carton, which suggests adding hot dogs and cheese and cooking at 350F (if using a dark, nonstick pan). Cut some veggie dogs in half along their length (so that they're thin), and then cut those slices so that they're about the length of the largest width of the crescent triangles. Place the veggie dogs on the shortest side of each triangle, and some cheddar cheese onto the roll (I recommend Daiya), if desired. Then just roll them up! Bake for 12-15 minutes, until golden brown. Serve warm.

The tortilla chips went great with the jalapeño queso dip, another recipe from VegNews (I used the Daiya cheddar cheese instead of mozarella). It was very good!

And...my favorite part of the evening was my buffalo-style tofu. SO good. You can get the recipe here.

The sandwich cookies speak for themselves, but I should say there is some debate over whether or not Oreos are vegan.* If you want to be safe, you can check out Newman-O's which are most definitely vegan. They're also a bit healthier, although I'll admit the taste is not quite the same as your classic Oreo.

*First of all, I should say that PETA lists these cookies as vegan. While none of the ingredients are animal-derived, it depends on how you feel about sugar processing. Most commercial sugars are filtered with activated carbon, which is often derived from animal bone char. This part of the process is so far removed from the final product that it is deemed kosher parve (meaning that according to Jewish dietary law, it contains no meat or dairy by-products). Many vegans, however, prefer to avoid any sugar that may have been processed with bone char. Vegan table sugars are available at some health food stores.    

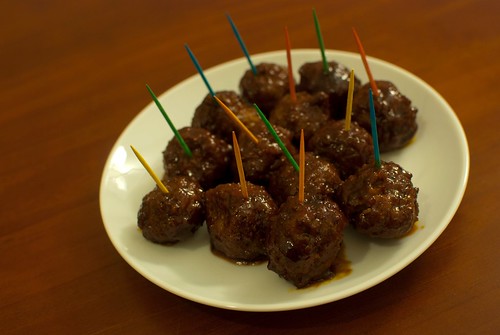
Barbecue (apricot) meatballs


Barbecue apricot meatballs


This recipe is simple and straightforward, but these make the perfect little party bites, especially for a game night. If you're looking for something fast and yummy (and not so sophisticated), that is pretty much foolproof, this is the recipe for you!

Easy Barbecue Apricot Meatballs
What You'll Need:
3/4 cup barbecue sauce (I recommend Annie's, or making your own!)
1/2 cup apricot preserves
1/4 cup water
1/4 cup beer (or more water)
About 20 vegan meatballs (if you're not preparing your own, I'd try Nate's Meatless Meatballs)

What You'll Need to Do:
Add barbecue sauce, apricot preserves, water, and beer (if using) to a large pot. Bring the mixture to a boil, then reduce heat to low, and simmer for about 20 minutes. Add the meatballs, stirring until they're well coated. Raise the heat slightly, simmering until heated through (about 5 minutes).

Tips and Tricks:
Nate's meatless meatballs are frozen, so heating them through takes a full five minutes. If you've made your meatballs yourself and they're not frozen, you might need to lessen the time--just pop one in your mouth as you go to make sure they're heated through.

A good barbecue sauce makes all the difference here. You want something that has a bit of a spicy, peppery kick to it, because the sweetness of the apricot will balance that out nicely. I'll try to post one of my favorite barbecue sauce recipes sometime soon. I like to make barbecue sauce myself because it makes a big difference in terms of flavor, is a great way to save some money (particularly if you enjoy the more expensive, organic sauces), and sometimes it can be hard to find vegan barbecue sauce at the grocery store.

If you're looking to make your own meatballs, I recommend trying this recipe, from Kathy Patalsky. It looks great, but I'll admit I haven't tried it yet. I'm generally not a big meatball person, so I've never actually made my own..although it's on my list of things I'd like to try!

Monday, February 11, 2013

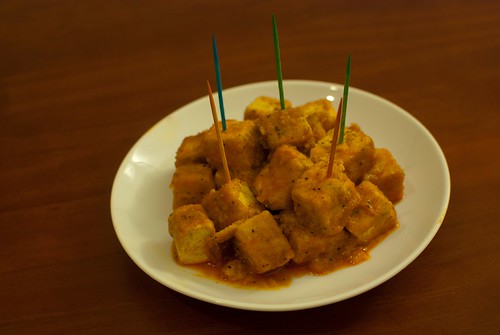
Buffalo-style tofu

Buffalo Tofu!

My boyfriend loves spicy food. When asked what he misses the most from his meat-eating days, his two answers are steak and buffalo wings. I can't do much about the steak at this point (although I do make a mean seitan), but I've made it my mission to find a good buffalo sauce.

Chefs beware! This recipe is not for the weak-of-heart. It's a true spicy Buffalo sauce (although if you want to calm things down a bit, see my Tips and Tricks).

Buffalo-style tofu
What You'll Need:
One package extra-firm tofu, chopped into 1/2" cubes

Marinade:
1 cup beer (I used an amber ale)
2 tbsp orange juice
1 tsp chili powder
3 cloves garlic, crushed
a few dashes salt and pepper

Breading mix for frying:
3 tbsp flour
2 tsp garlic powder
1/2 tsp salt
1/2 tsp pepper

Buffalo Sauce:
1/3 cup Frank's Hot Sauce
1/4 c. melted margarine (I recommend Earth Balance)
2 tbsp vinegar
1/8 tsp cayenne pepper
1/8 tsp garlic powder

What You'll Need to Do:
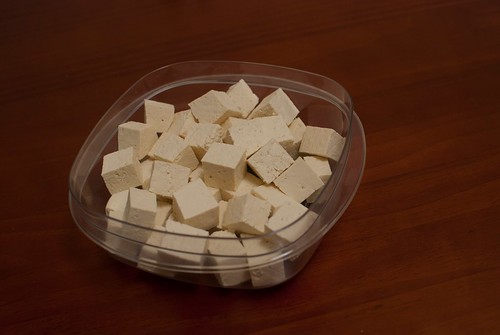
Press your tofu, then slice into 1/2" cubes and marinate (see below). Once the tofu has marinated (for at least one hour), drain it, and combine it in a small bowl with the breading mix to coat the tofu before frying.

In a large skillet, heat about 2 tbsp of oil (olive or vegetable) over medium heat. Cook the tofu for 4 to 6 minutes, turning until golden brown and lightly crispy on all sides. Meanwhile, prepare the buffalo sauce.

Combine buffalo sauce ingredients in a pot and stir well. Raise the heat to medium and stir occasionally until heated through. Add the fried tofu to the sauce when ready, stir, heat, and eat!

Tips and Tricks:
If you'd like to decrease the spice a bit, you can try increasing the butter, to 1/3 cup.

I would definitely recommend serving this with a vegan ranch or blue cheese dressing (I'll post a recipe soon!).

This sauce goes great with any veggie chicken. Sometimes my boyfriend will buy pre-prepared vegetarian buffalo wings, and dip into this stuff for a little extra oomph.

A note on marinating tofu:

Marinating tofu is much like marinating meat, with one important difference: tofu has no flavor before you marinate it! So if you like fried tofu in general, and don't feel like marinating it for this recipe, you can do that, and you'll still have a nice, spicy buffalo exterior. Marinating the tofu, however, will give you a really delicious bite, that's filled with flavor through and through. It's super easy, too!

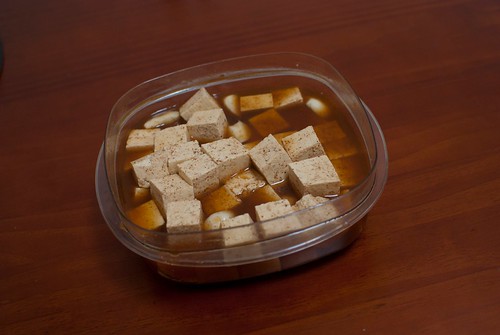
The first thing you'll need to do is press your tofu. This is important so that the tofu can absorb the marinade completely and thoroughly. I'd recommend 30 minutes on each side, but you can cut it down if you don't have that much time.

Then just pour in your pre-mixed marinade ingredients, cover, and throw it in the fridge until you're ready! I like to use a tupperware, so that I can shake things up every so often and make sure it's well distributed. The longer you can marinate, the better; I marinated this tofu for about three hours, but the longer the better! You probably want to give it at least one hour, though.

Tofu ready to be marinated!

Marinating tofu

The marinade listed above is really, really simple. If you're planning on showcasing the tofu on it's own as a marinated protein, you can add in some specific spices and herbs, for example to make Asian or Italian-style tofu (pictured below). I'll try to post one of these recipes soon!
marinated "Italian" tofu